Game Electronics
Arduino
An Arduino Mega serves as the brains for the game. The Mega was selected over other Arduino boards for its large number of digital pins (over 50!). Arduino's extensive documentation made it easy to integrate all our systems and write code.

Motor Drivers
Our motors use 12V and draw approximately 0.25A. Because powering the motors directly would put undue strain on the Arduino, we built motor drivers that allow us to provide power to the motor while still controlling it from the Arduino. Each driver has four transistors (one per coil of the stepper), which are controlled by the Arduino. We use three drivers to power the three motors, and all three are assembled on one breadboard.

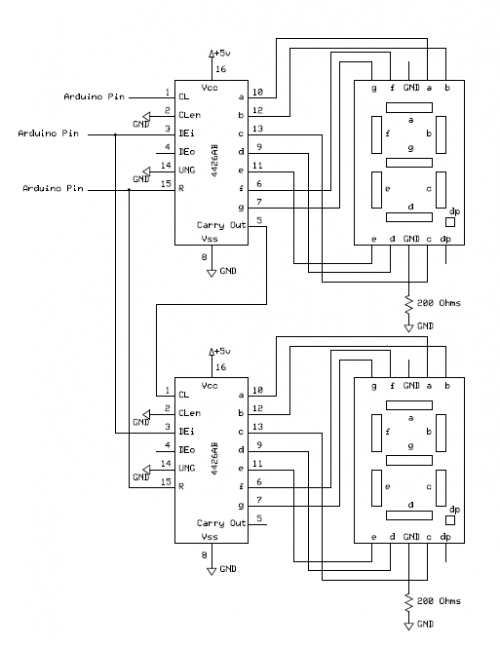
Display
The display tells the player their score and their current fuel level. The score is displayed on a two-digit, seven segment display. When the game ends, this display blinks three times and resets. The fuel gauge is made up of a row of sixteen LED's. As fuel is used, the lights turn out sequentially. Two shift registers are used to turn out the lights as fuel is used. The Arduino communicates with the chips on this breadboard to reset and increment the counters.


Inputs
There are nine buttons total in the game. Four are in the joystick, three are targets, one is to start the game, and one is to land the rocket. The states of these buttons are read by the Arduino, but the buttons must be wired to pull-up resistors to reduce noise. The third breadboard contains those pull-up circuits.
