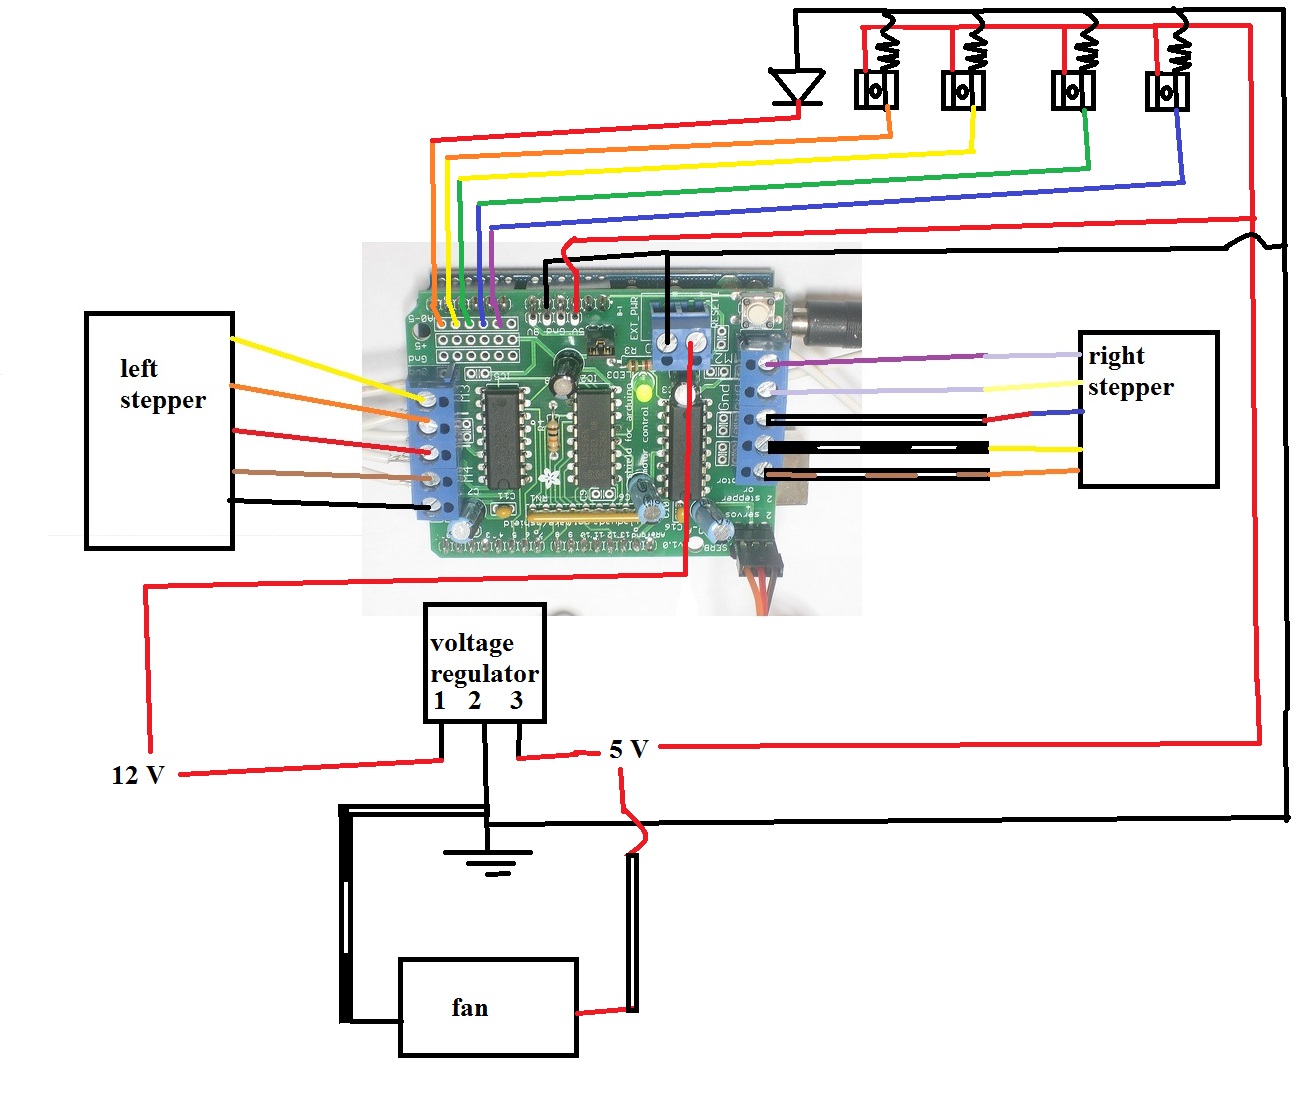
The following diagram is of all of our electronic components. For the buttons in the upper-left portion of the diagram, the rightmost button is for right, next is left, then down, and lastly up. The resistors used were 470 ohm. At the bottom of the page is a link to the internal wiring of the motorsheild, which is what we used to figure out what pins were free for button use. Also at the end is documentation for the voltage regulator.
Except where otherwise noted, content on this wiki is licensed under the following license:CC Attribution-Noncommercial-Share Alike 3.0 Unported

