Tutorial for Toolpathing Phone Stand
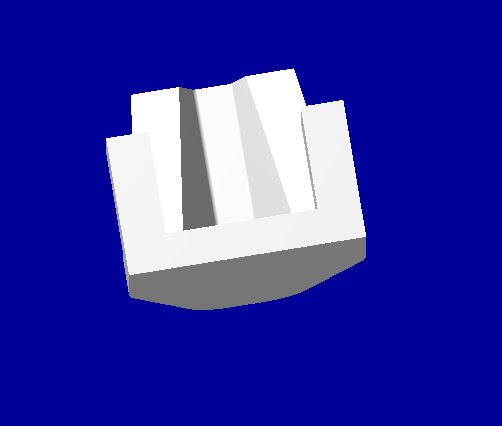
A cellphone stand has been designed for you in solidworks and exported as an IGES.
email your finished .mcx file to short.dale@gmail.com. You don't have to turn in your .nc gcode. go to file→open and open the .iges part.
go to screen→shade settings and check shading active (I also turn on a grid sometimes to orient myself)
go to machine type → mill and select default
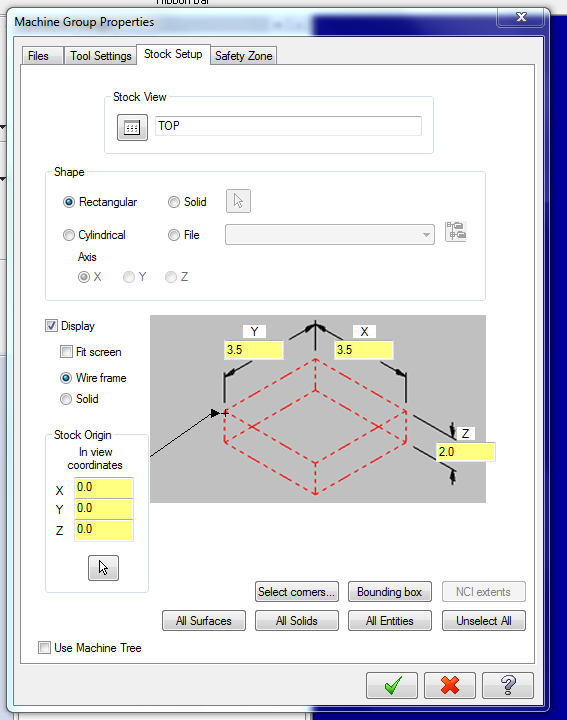
enter stock setup and enter the following information
The first step is to center the part in the stock.
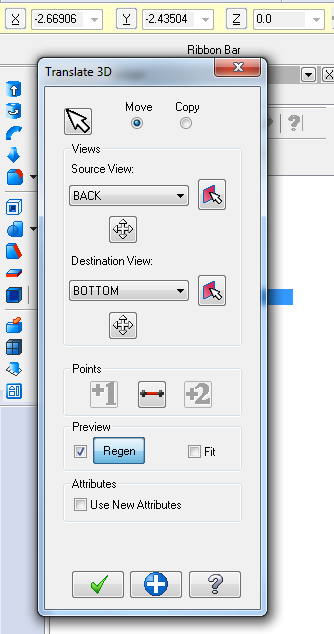
select xform→translate3D and select by drawing a box around everything and hit enter enter 0,0,0 as the center point of rotation for both source view and destination view (click the + shaped arrows, then type 0 in for X,Y,Z in the yellow bar at the top)
make the translation go from BACK to BOTTOM and change it to MOVE if it isn't already
accept the translation with the green check mark
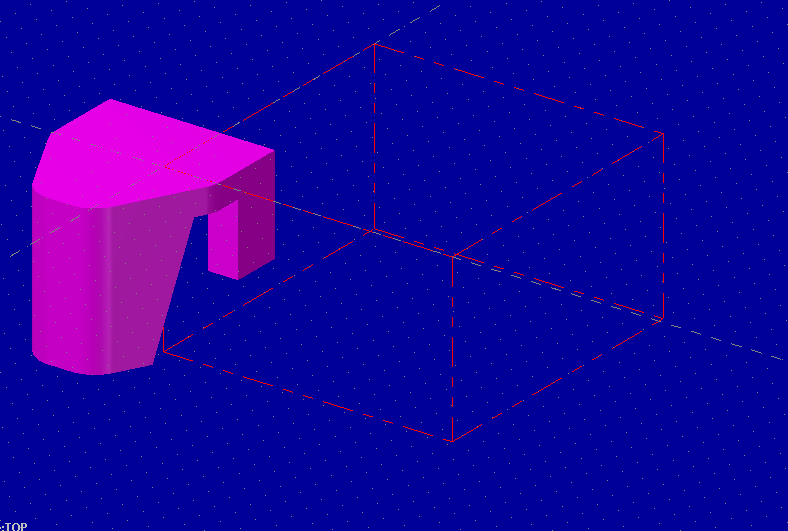
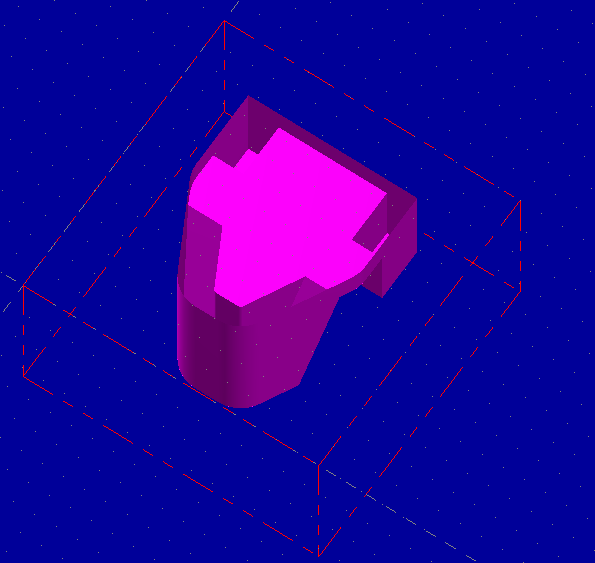
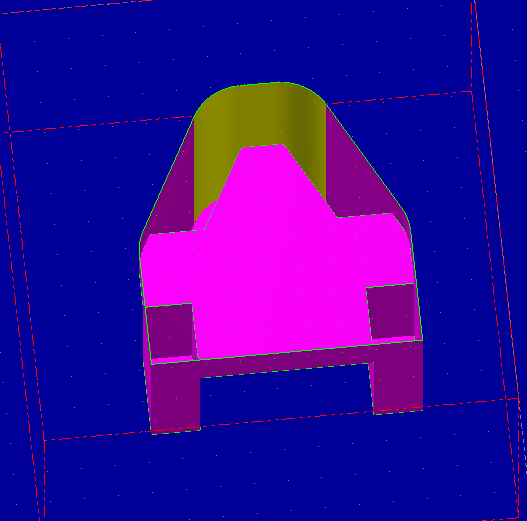
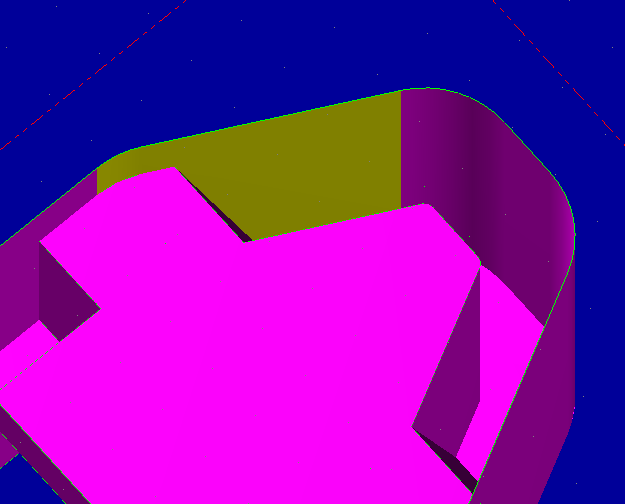
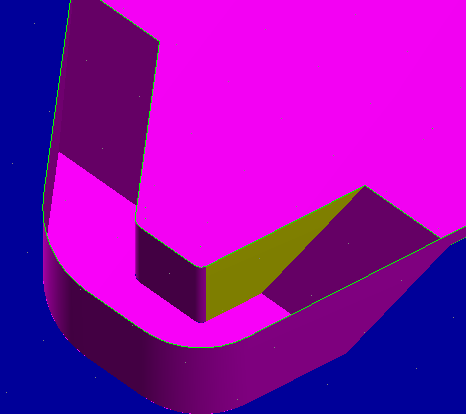
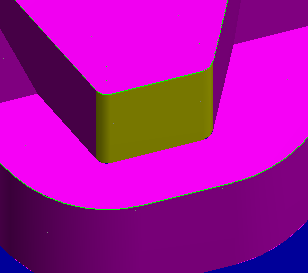
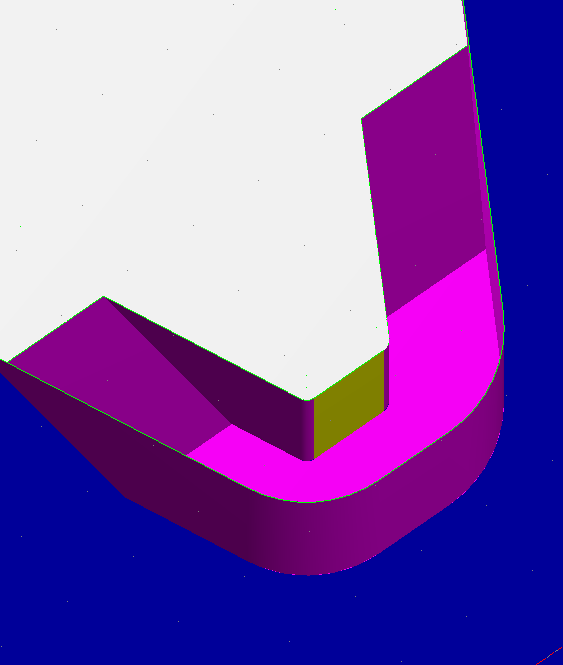
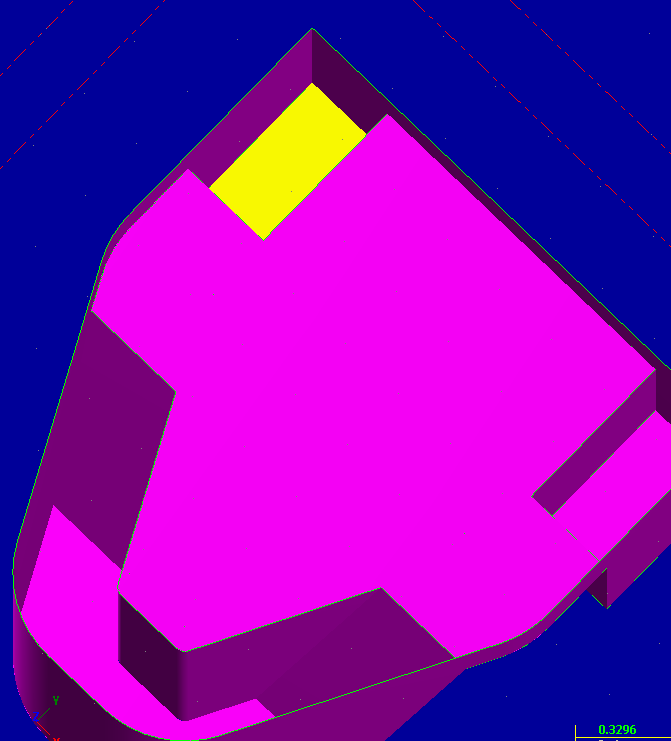
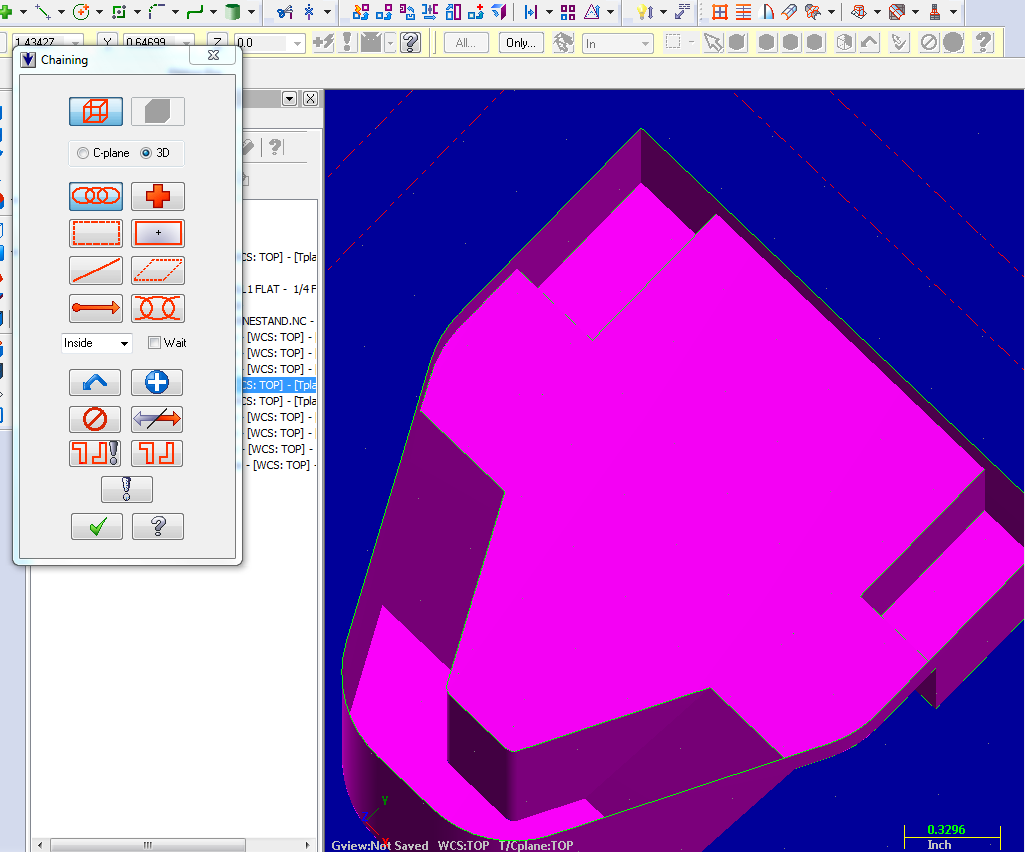
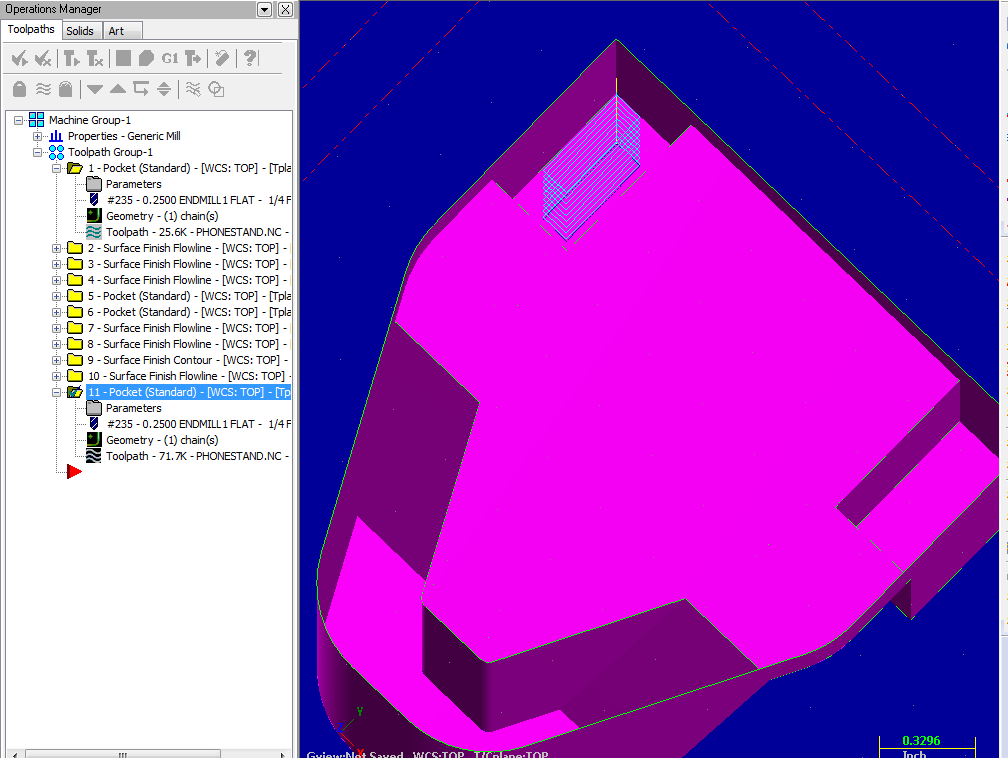
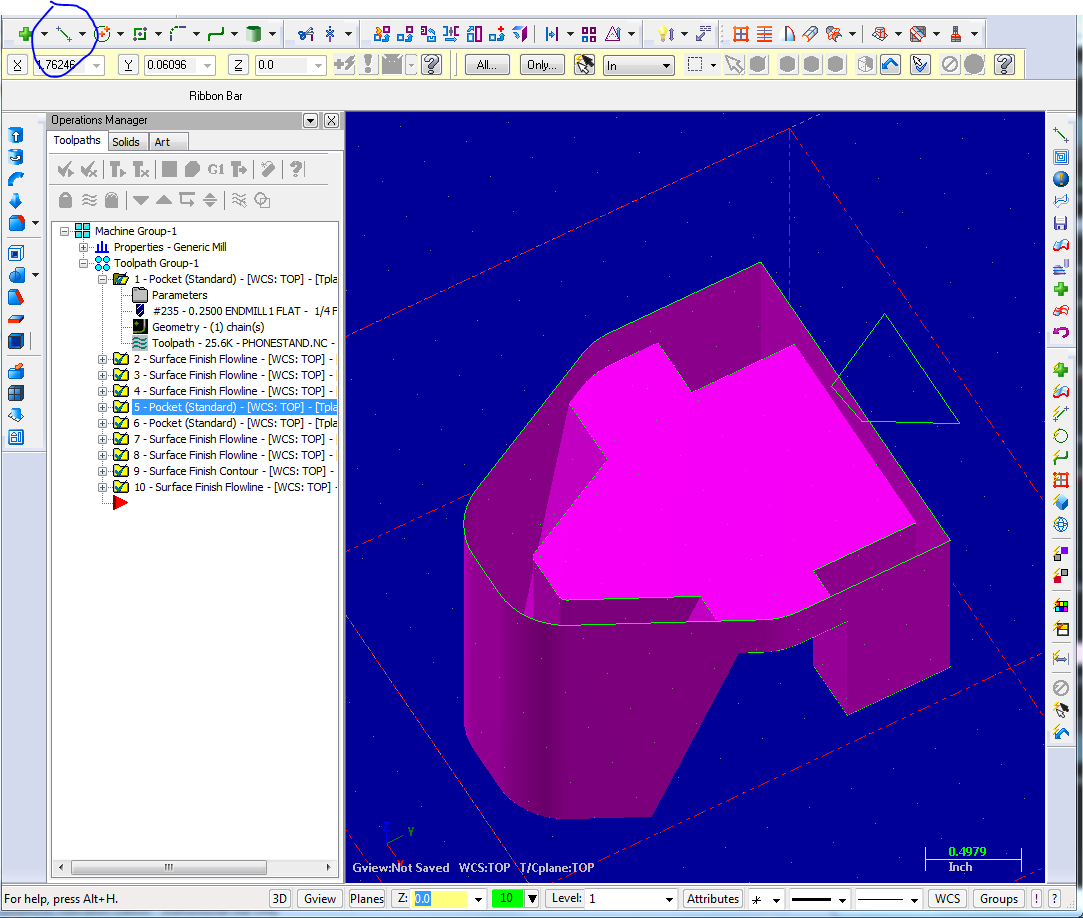
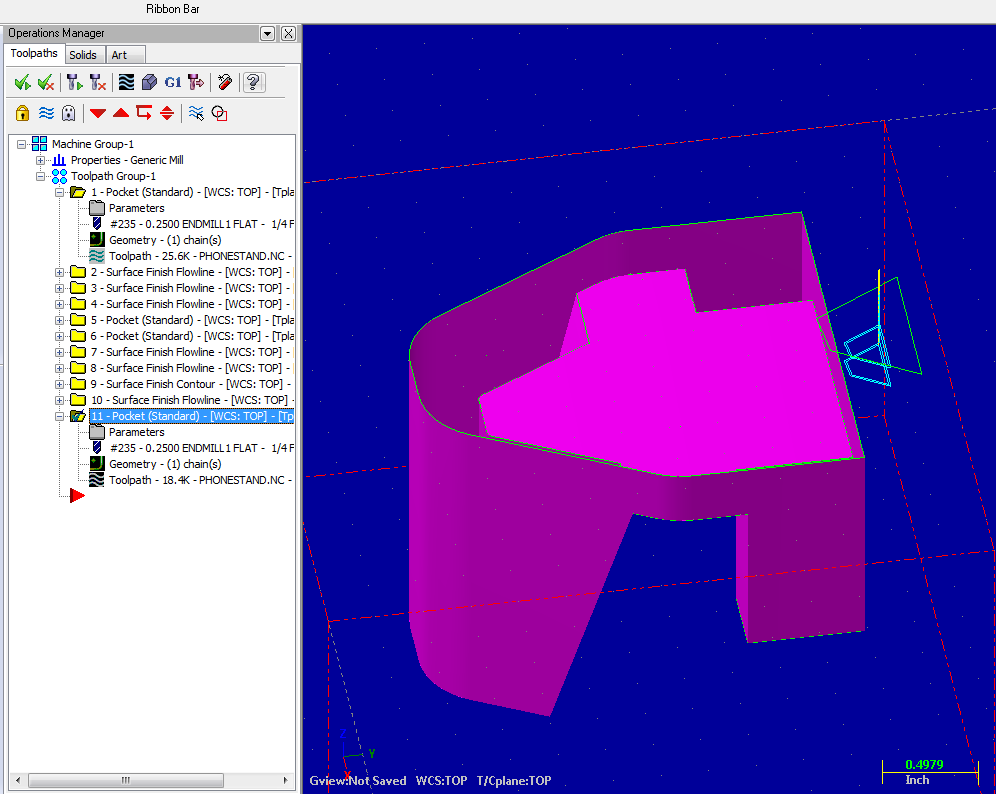
select the base (now top) of the phone stand and delete it. This picture is from later in the tutorial but shows what the stand should look like with this face deleted.
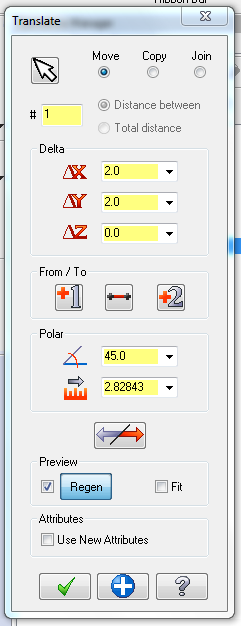
select xform→translate (not 3D this time) and select by drawing a box around everything and hit enter. Enter the translation below.
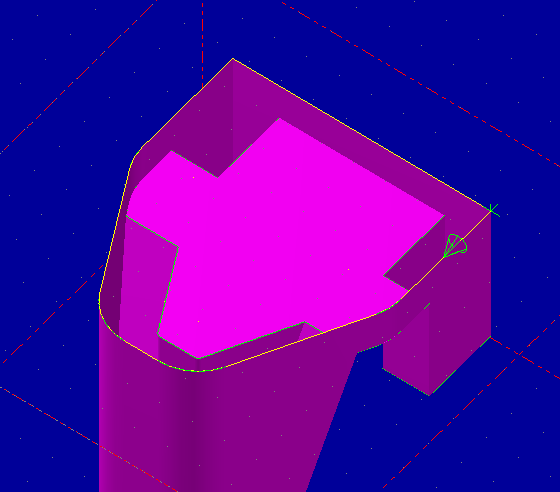
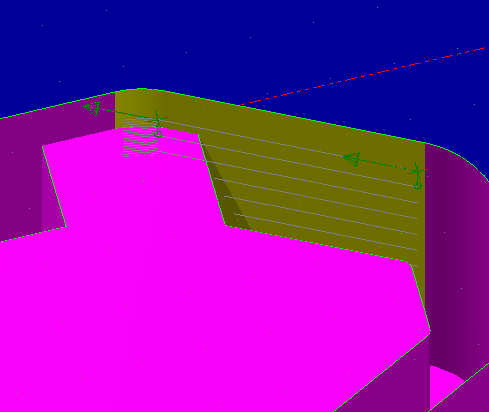
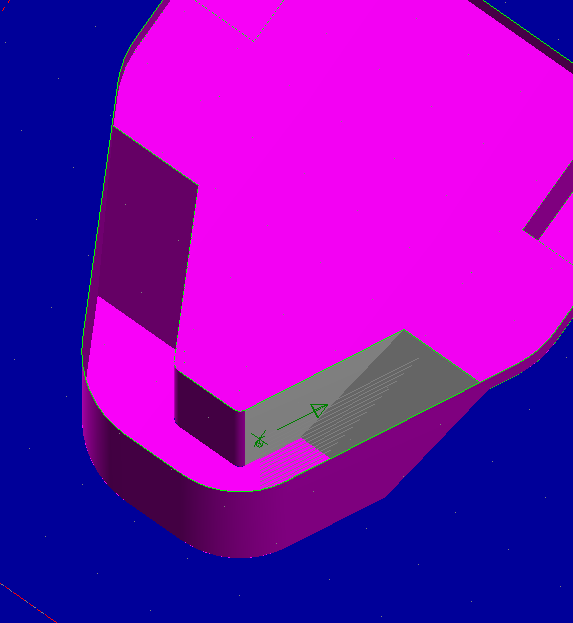
use create→curve→curve on one edge to create a curve along the bottom of the stand (the top most edge in software now that the part is upside down) for each surface. The idea is to have a line defining the base of the stand for the first tool path operation. Ignore the green arrow in the picture below but note how the top edge is hightlighted in yellow showing the curve.
select toolpath→ pocket
go ahead and accept toolpath refinement (and for the rest of the tutorial you can accept it) and give the NC code a name.
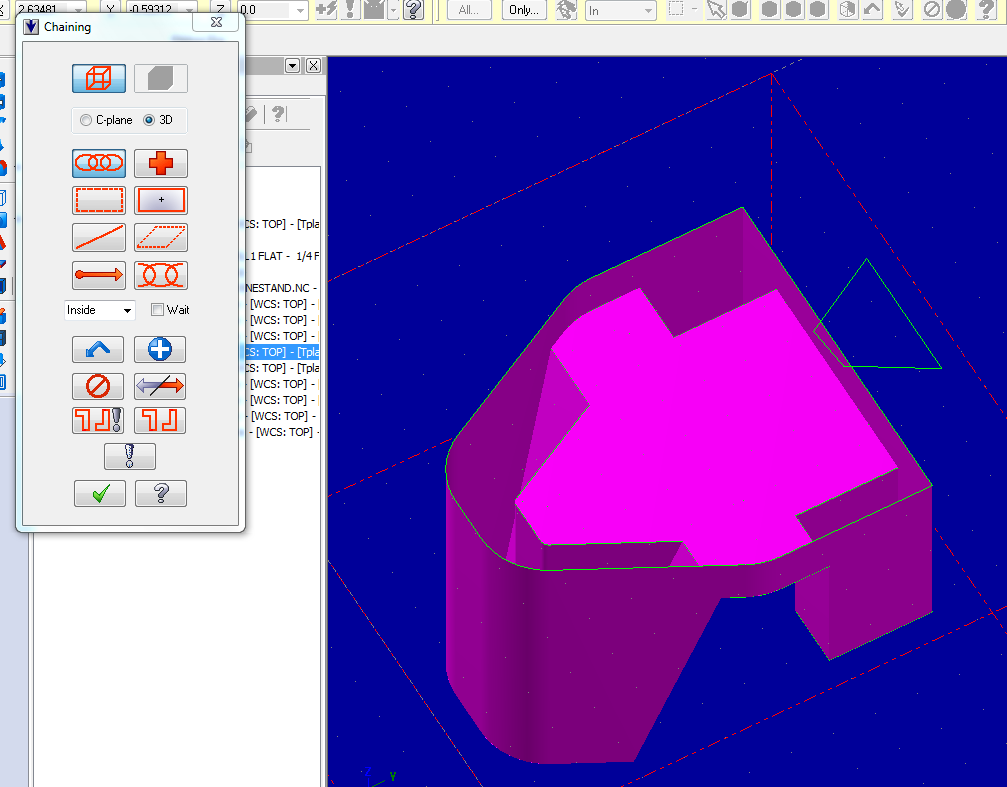
When prompted for geometry select the top edge curve you created. Notice how a green arrow appears. Accept this.
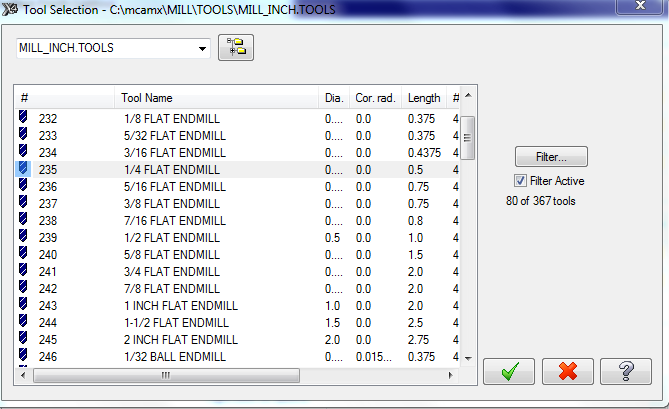
hit the select library tool and select a 1/4” flat endmill out of mill inch tools.
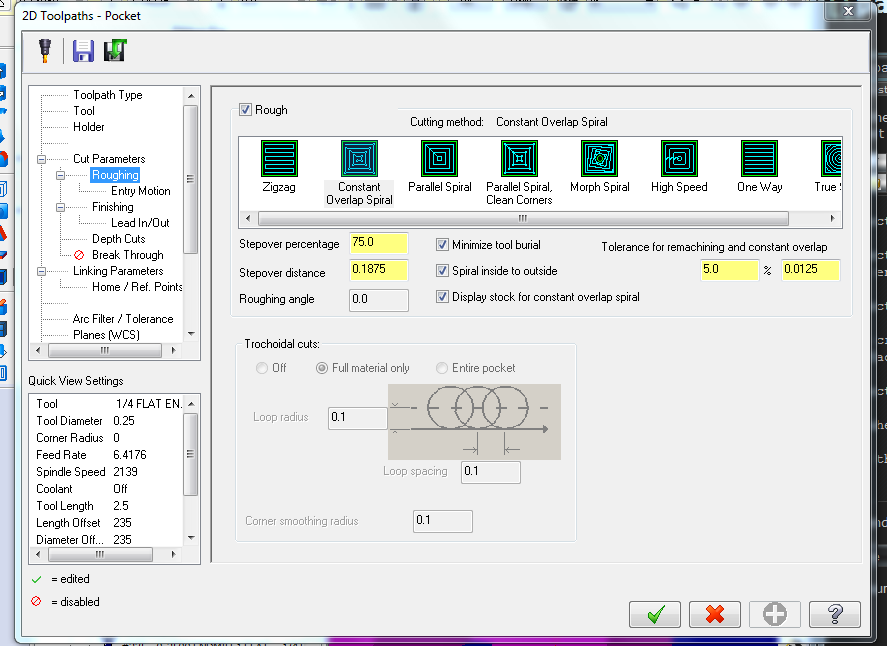
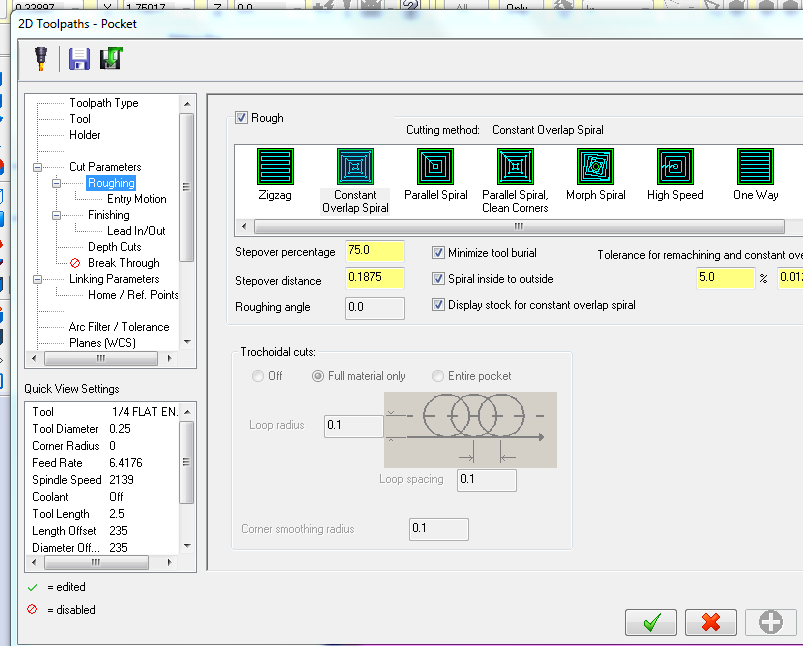
select constant overlap spiral under roughing
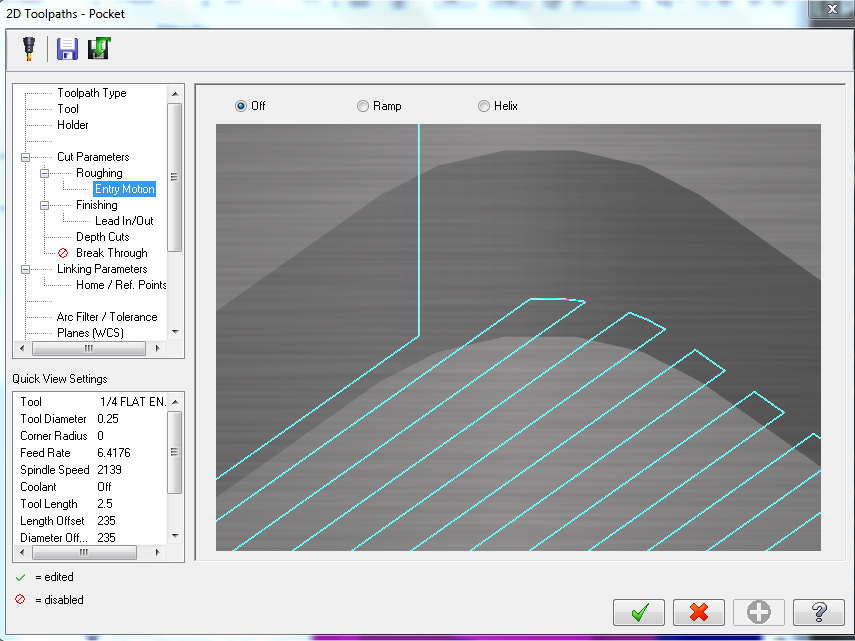
select off for entry motion
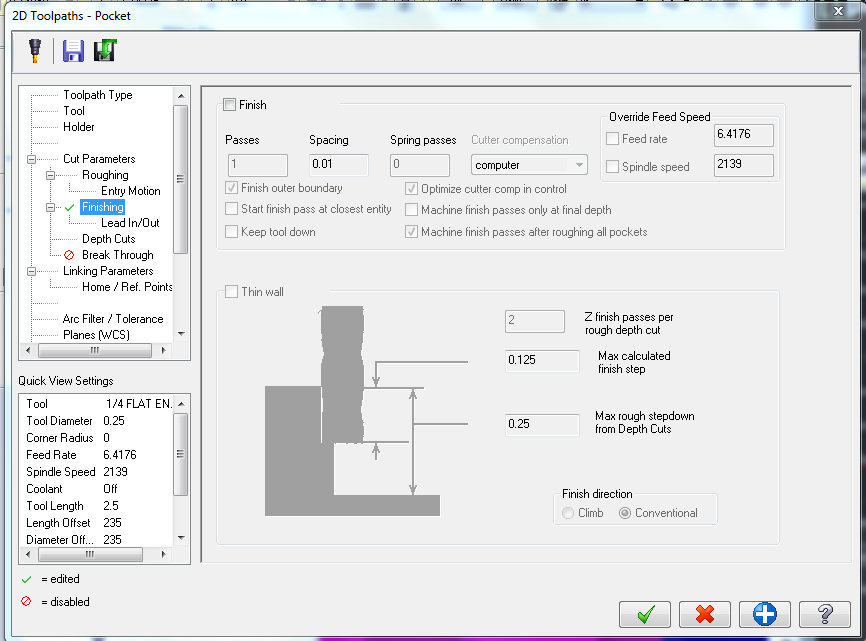
uncheck finish
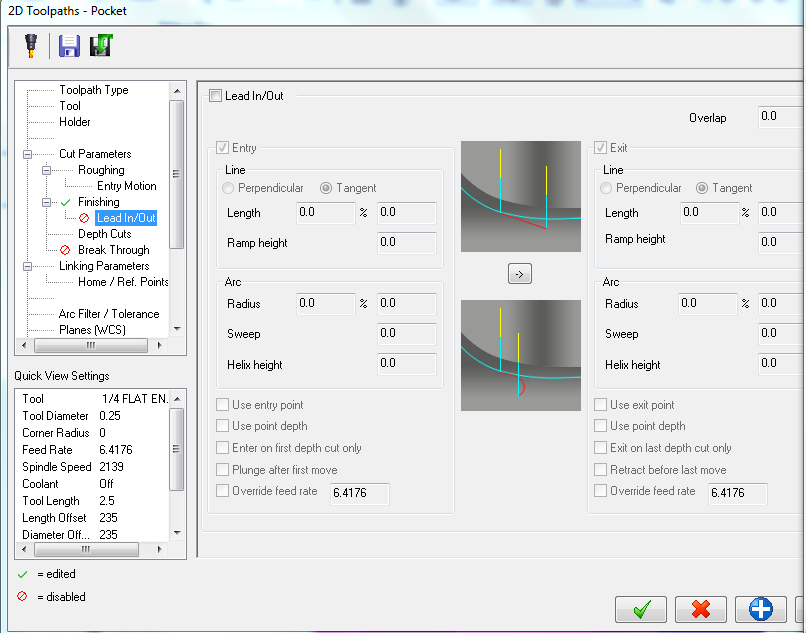
uncheck lead in lead out
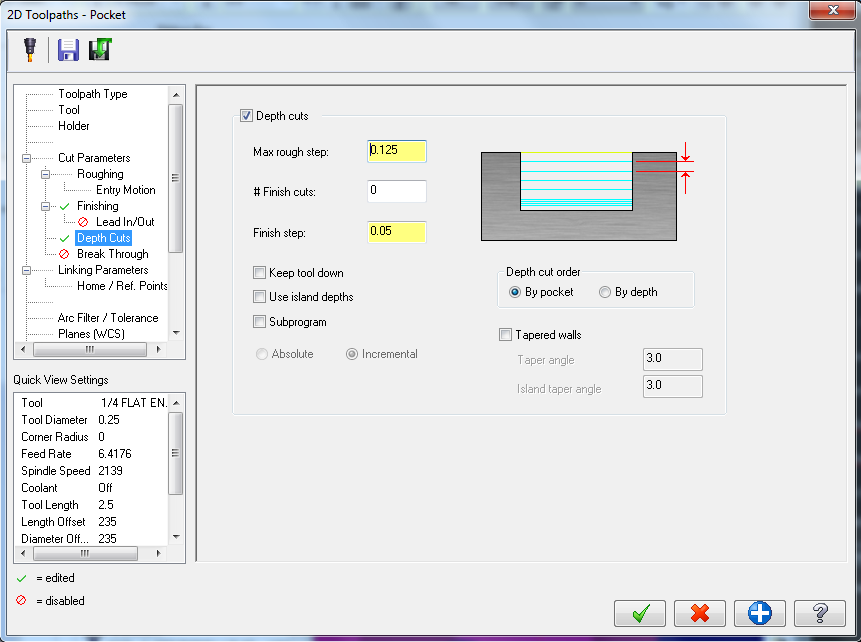
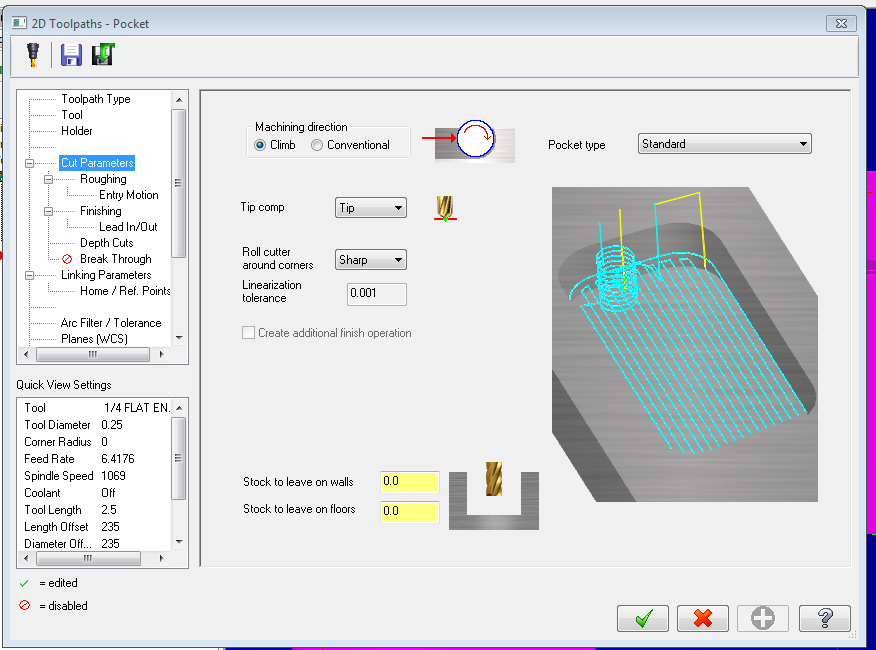
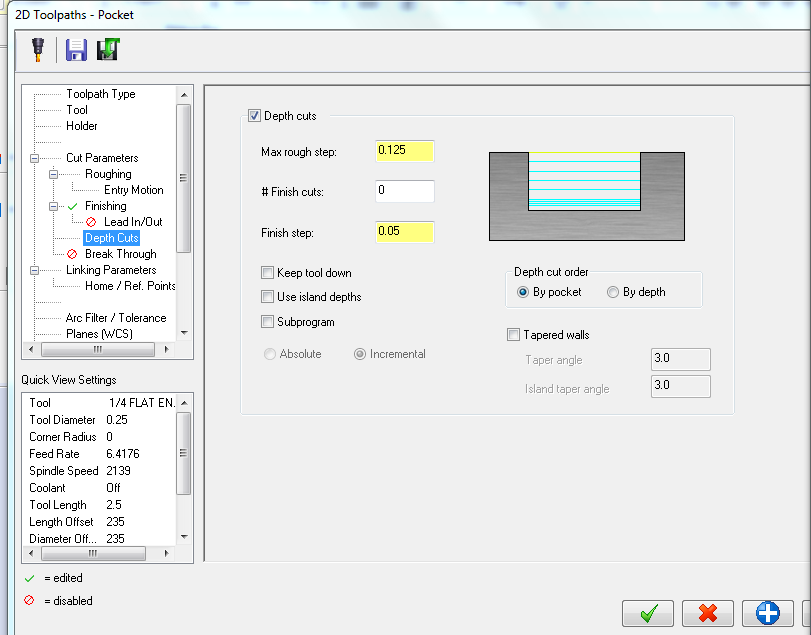
check depth cuts and set max rough step to .1. Do not use .125 as shown in the image below.
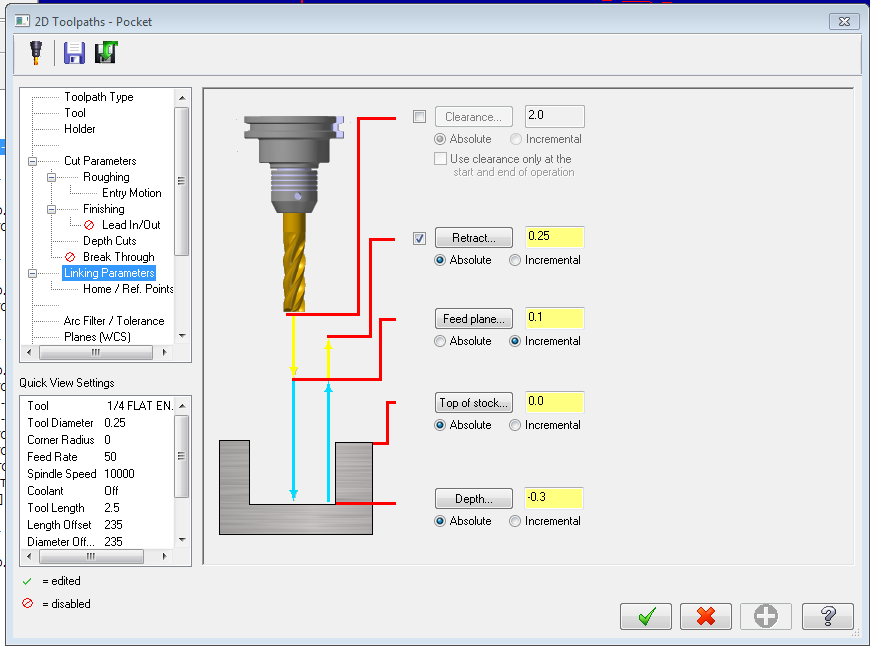
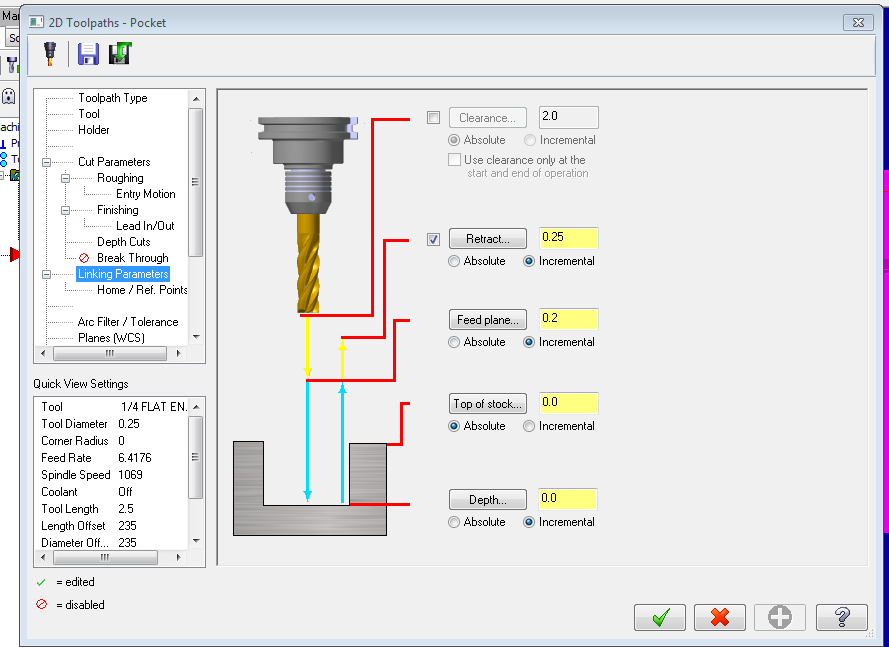
Set the depth to -.3 in linking parameters.
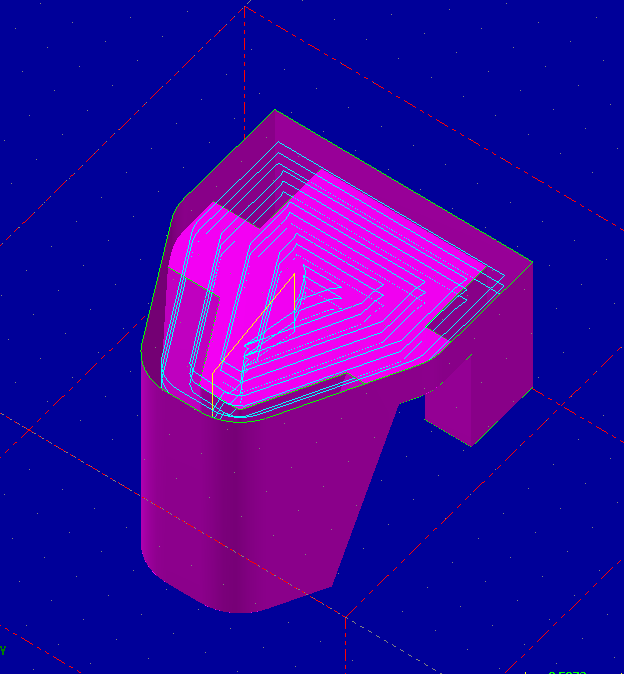
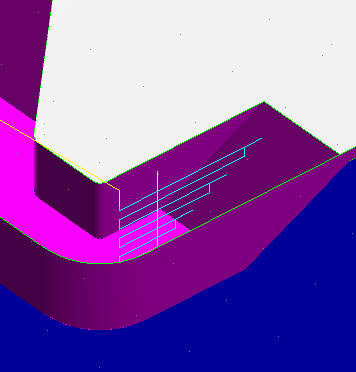
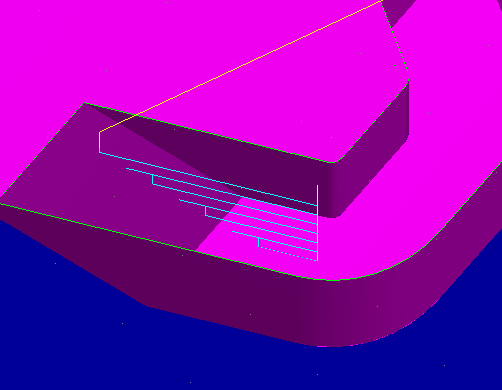
accept the toolpath. Holy pocket toolpath batman! It works! The blue line is the motion of the center of the tip of the tool. Yellow marks the rapid (150 inches/min) positioning moves made by the tool. The software calculates the compensation for the tool width and designs a cut based on the geometry we specified.
toggle toolpath display is useful for keeping the screen uncluttered. Also when a toothpath has a red X over it, it is out of date and you must click the regenerate toolpath to recalculate the path.
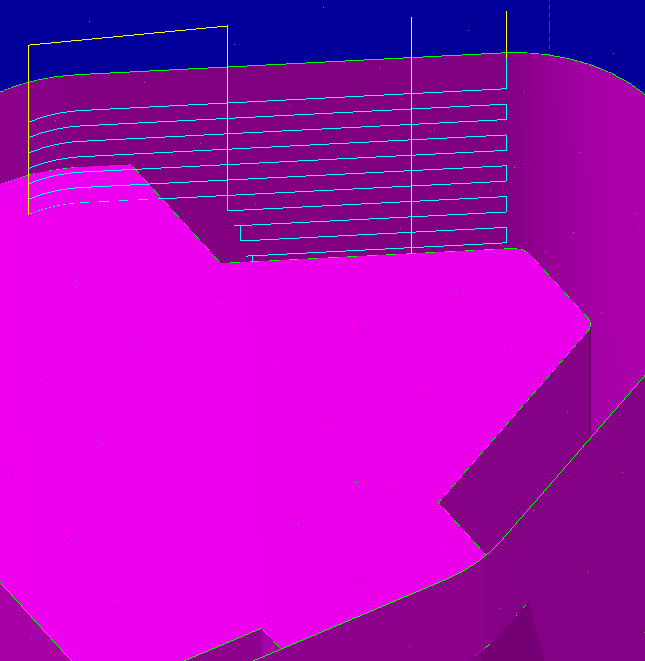
The toolpath should look like this.
Now create a suface finish flowline toolpath.
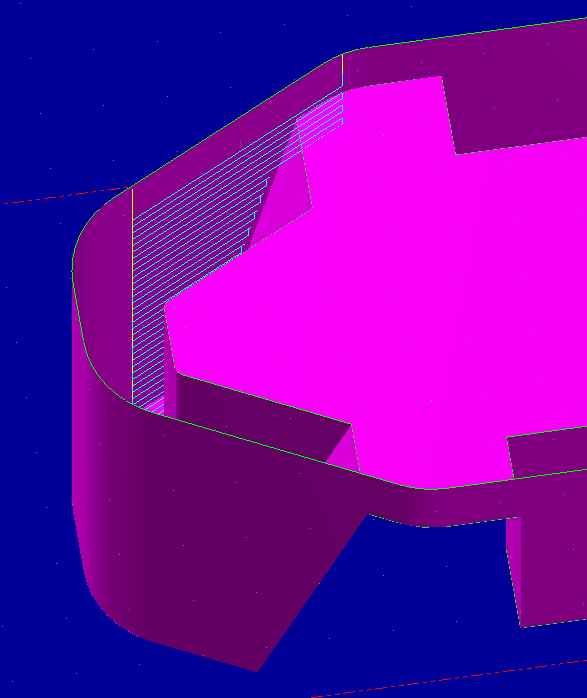
for drive surfaces select these three faces.
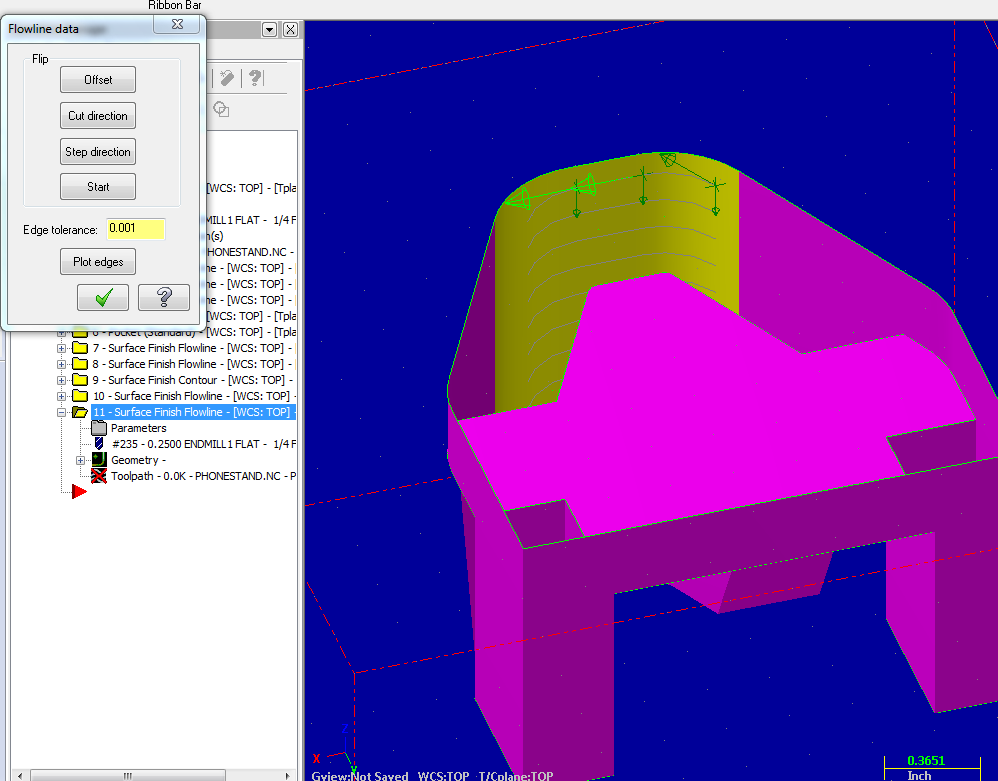
click the flowline button
play with the various flip flowline buttons to until the gray lines are horizontal and the arrows are at the top. Also make sure the offset is into the part. It should look like this.
select the flat endmill for the tool.
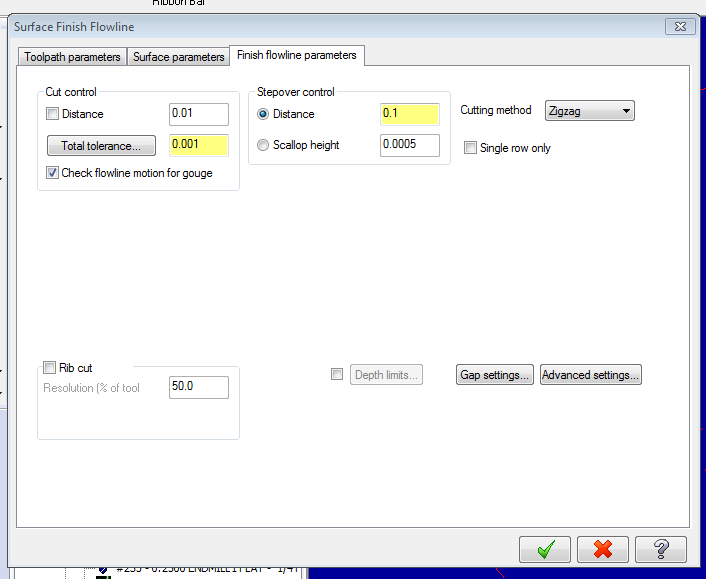
Set the step over control to distance .1”.
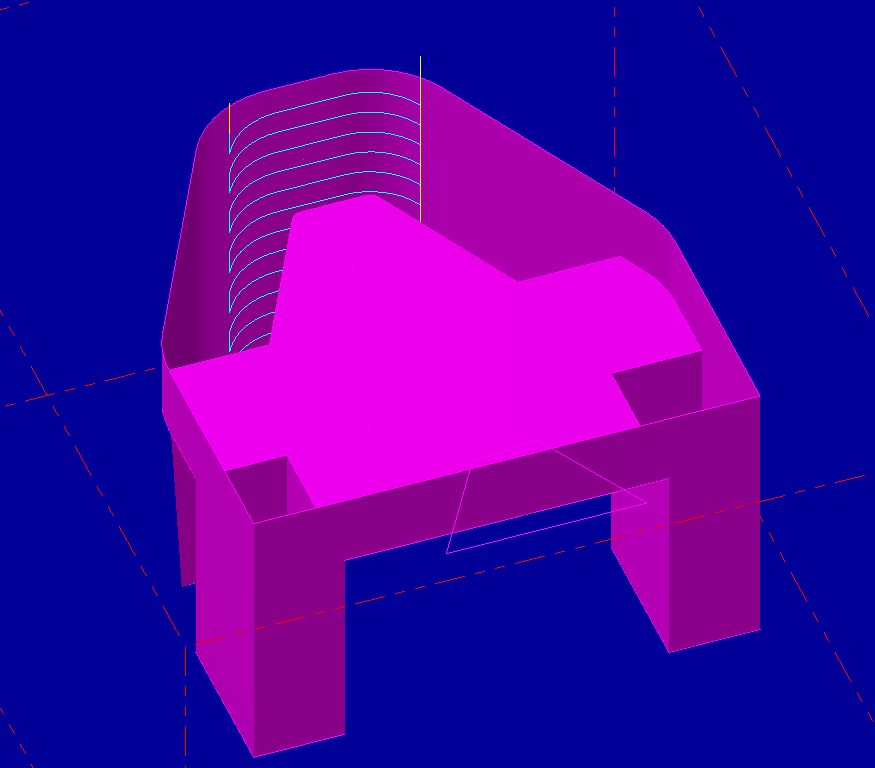
No other changes are needed so accept the toolpath. It should look like this.
Create another flowline based on this surface as a drive surface. Edit: I seem to have two surfaces selected here. You don't need to have the small inter curve surface selected since the pocket takes care of the surface. You can just select the one big surface
Select check to add a check surface and select these surfaces.
make the flow go this way by clicking the various buttons.
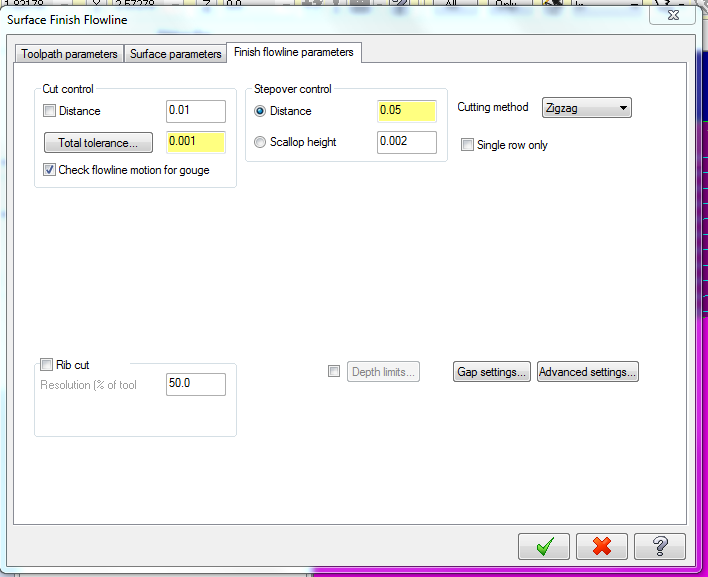
under parameters set the stepover control to distance at .05”. No other changes are needed.
the path should look like this.
create an identical flowline on the other side like this. If you are feeling comfortable with masterCAM, you can copy and paste the toolpath, then select geometry under the features manager, delete the old drive surface, change it to the other side, then regen the toolpath. Or you can't understand that just start from scratch and everything is the same except the drive geometry should be the other side of the stand.
I'm going to not give detailed instructions for this next toolpath since it is the same procedure as before. Create another flowline based on this drive surface.
this check surface
flow should look like this
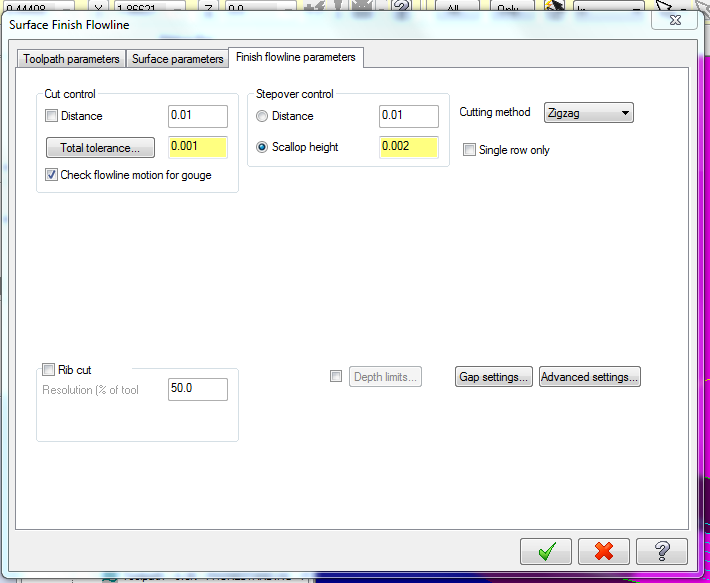
leave the flowline parameters at scallop height .002
This is what it should look like.
create the same flowline on the other side with the same procedure or by copy and pasting the toolpath and re-selecting drive and check geometry to the other side (advanced users).
now create a surface finish contour
for drive surface select these three faces
for check use these 5 surfaces
default parameters are fine. It will skip the middle flat portion which is odd, but not a problem since the next toolpath will machine it. EDIT TO DO I dont have a finished view.
create a surface finish flowline at scallop height .002 based on this drive surface with no check surfaces
the toolpath should look like this
select the bottom surface of the prong of the stand and use create→curve→ curve on all edges. The idea is to make a pocket as deep as the leg based on the curve defining the bottom of the leg.
select toolpath→pocket
click on the edge of the bottom surface to select the curve you created. If you get a prompt to select the next curve at a branch point click the next segment of the curve and keep clicking to complete the circle.
use the flat endmill for the tool
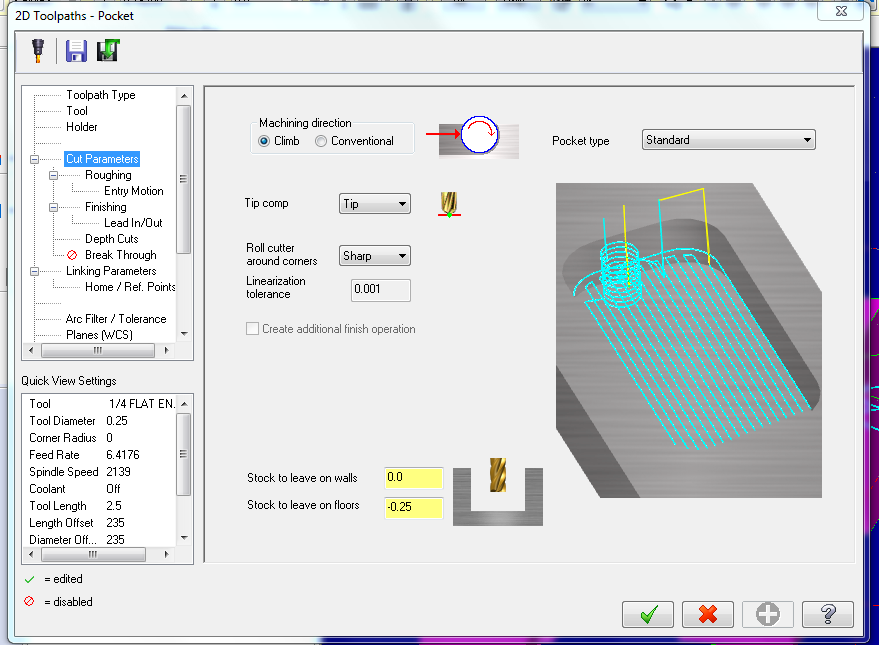
enter 0 for stock to leave on floors
set depth to 0 on linking parameters Edit: If you are having difficulty getting the software to cut the leg to the right depth, just turn in your code as is. I don't quite know why this keeps breaking.
constant overlap spiral
turn entry motion to off, uncheck finish, uncheck lead in and lead out
set depth cuts to .125
accept the toolpath. It should look like this.
create an identical toolpath the same way on the other side.
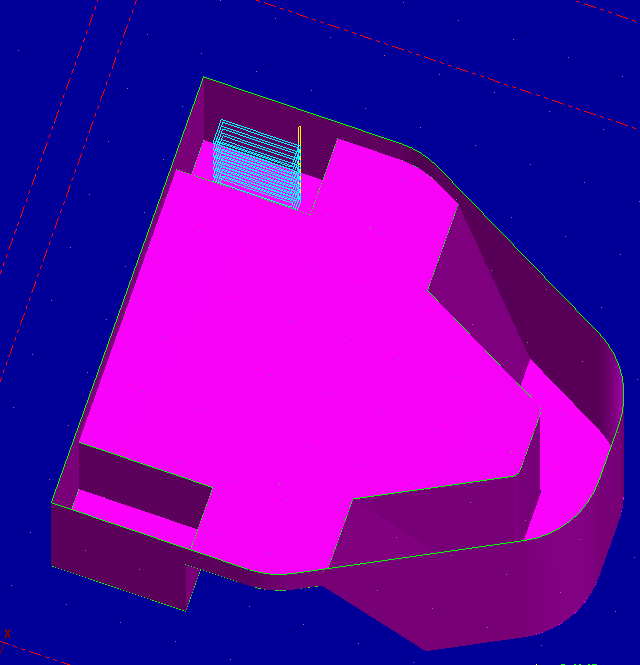
Entering geometry with mastercam will make you want to kill yourself unless you are Sinisa who is brilliant at it. I forgot to add a funnel for resin in the part design so we will use mastercam to create it. Use the line tool to draw a funnel shape at the top of the part. Do not leave the red dashed lines defining the stock. Do make the shape go into the part slightly. This will give you something to pour resin into.
select a pocket toolpath and select the shape you drew.
all the parameters are the same except for -.25 stock to leave on floors.
This toolpath will make a funnel for casting
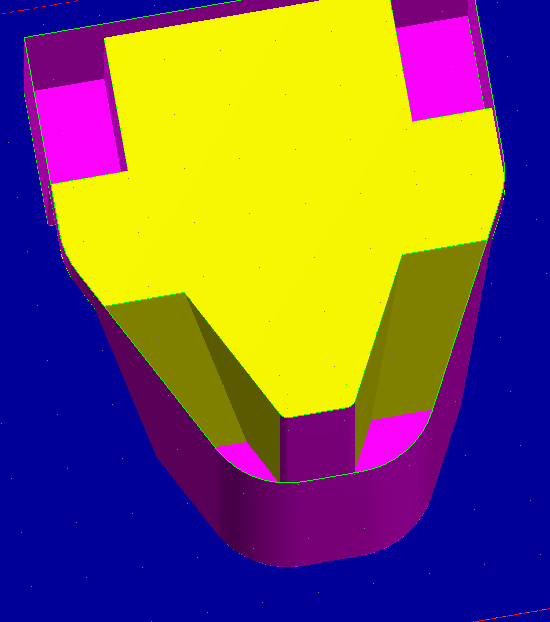
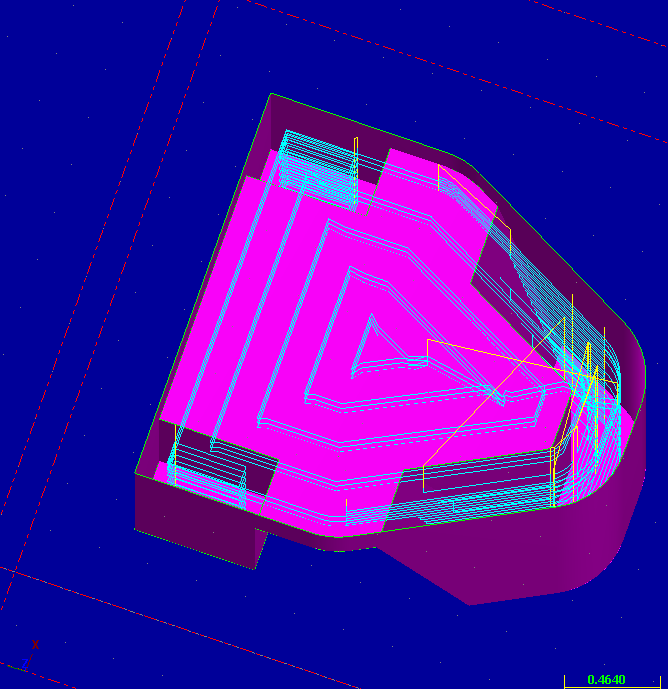
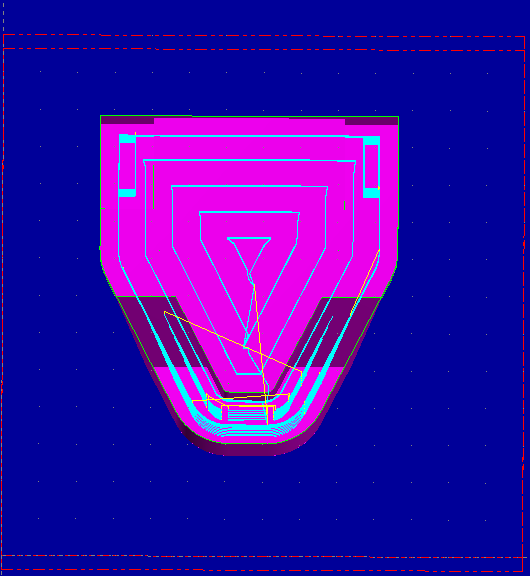
all the toolpaths are done. They should look like this. You may need to select the toolpaths in the feature manager and the click regenerate and display buttons. (EDIT: I didn't have the funnel displayed when I made these screen shots.)
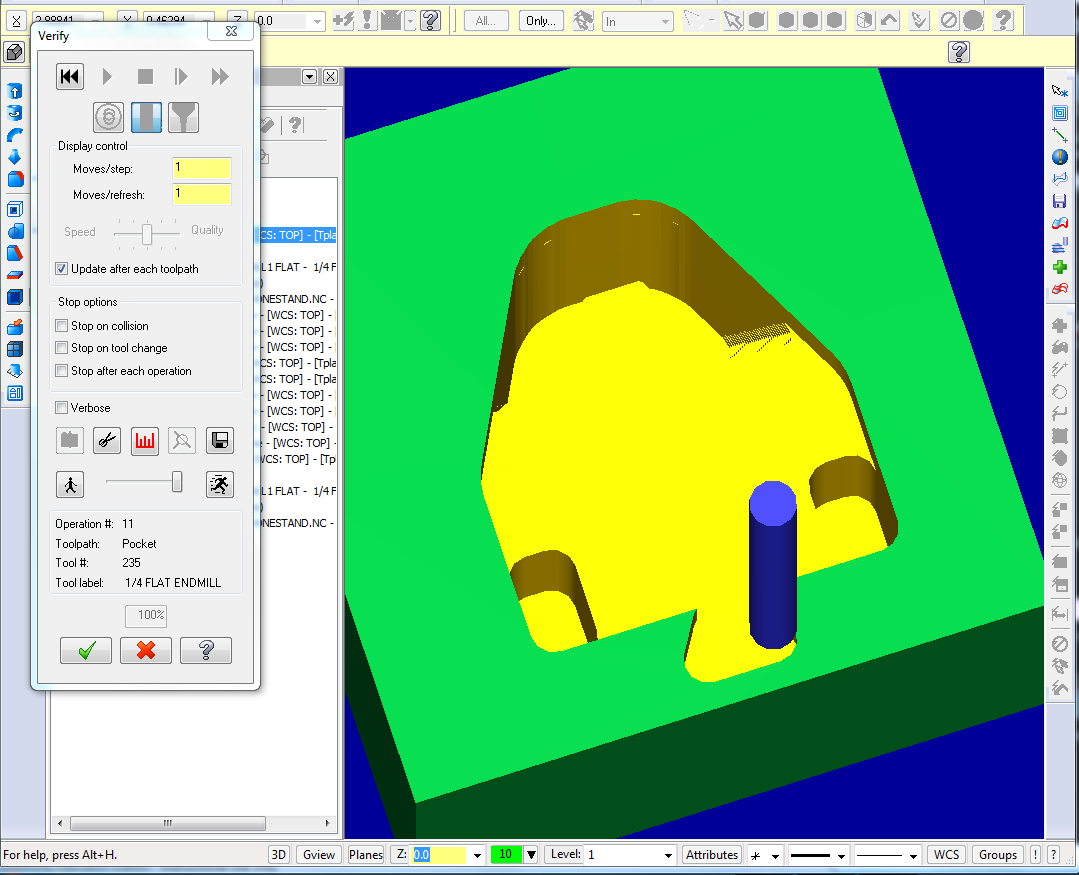
if you select all the toolpaths and click on the verify button you will get a simulation of what the part will cut like. Hit play to begin the simulation. These simulations are very important for preventing tool “crashes” which is when the machine gouges the tool into the stock somewhere where it shouldn't. One way this happens is in the rapid moves between toolpaths. Mastercam may have the tool rapid move between toolpaths in a way that will clip the stock. We will be using wax because there isn't too much harm in crashing the tool and this is why I need to have your toolpaths in advance; I can review them myself and check for errors. Anyways watch the simulation closely and check for the tool biting off too much material (more than half the diameter of the tool) or crashing into the stock.
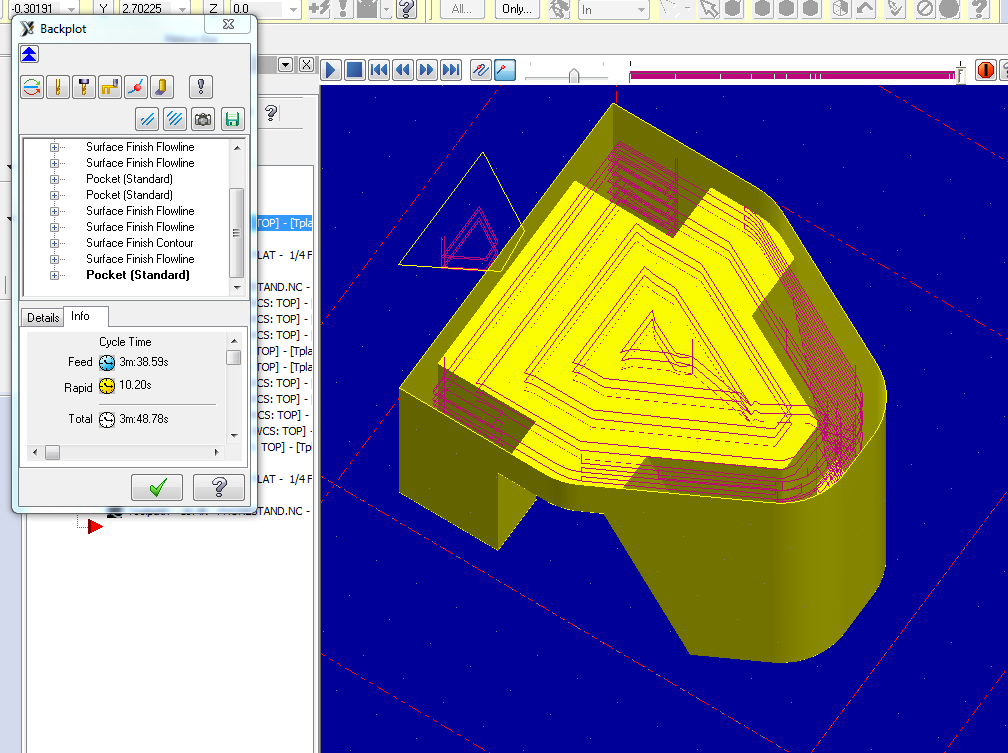
If you select the toolpaths and click backplot you get a similar simulation. Backplotting is useful and can estimate the time it will take to cut the part.
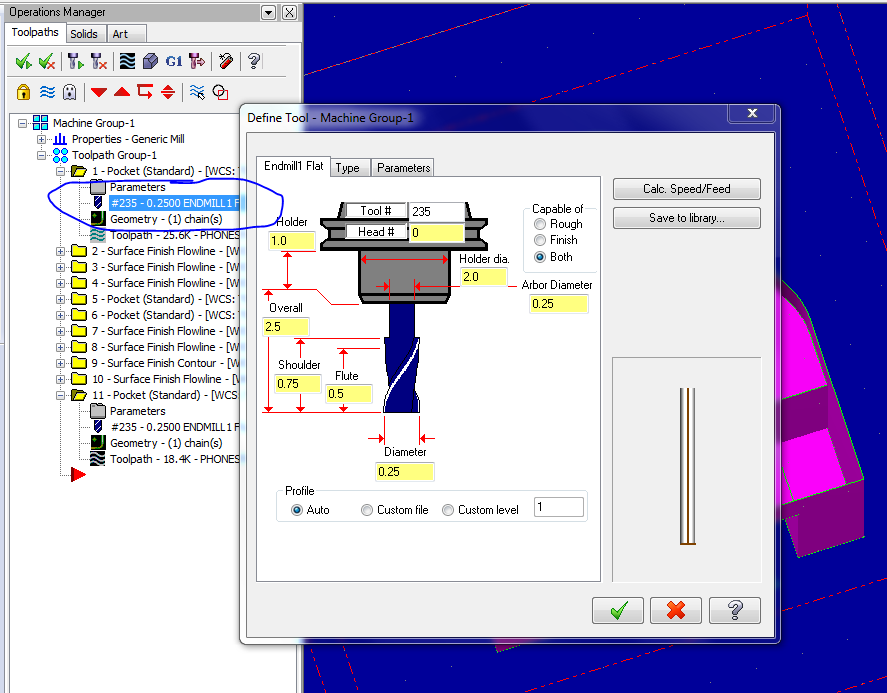
The default tool settings need to be modified to account for the soft wax. Under operations manager click on the blue tool icon under any toolpath to bring up this menu.
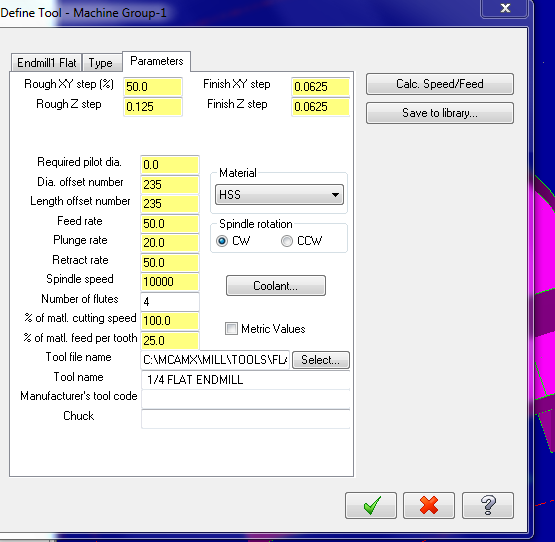
DONT change the settings to this. EDIT: No not use the feed rates below. Spindle speed is OK but set FEED AT 20 in/min and plunge at 10 in/min.
Click the save to library button and save your changes. This will update the feedrate for every tool.
Accept update this tool and all operations that use this tool
You will need to select all your toolpaths under the operations manager and select regen toolpaths button to apply these changes.
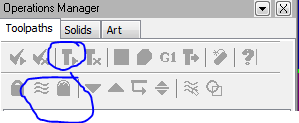
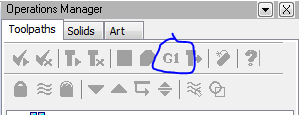
select all the operations and hit the post selected operations button which is a G1 icon at the top of the operations manager.
The default options are fine and save the .nc file along with your mastercam file. The .nc file can be opened with a text editor and merely specifies a whole bunch of machine commands and points. Send me both to review for errors.
You are DONE!
