EID 103
Here is the work done for my EID 103 - Intro to Design Class. Work was done alongside Hunter McKane, Wilfrido Castillo, and Ashley Kim.
Drawbot
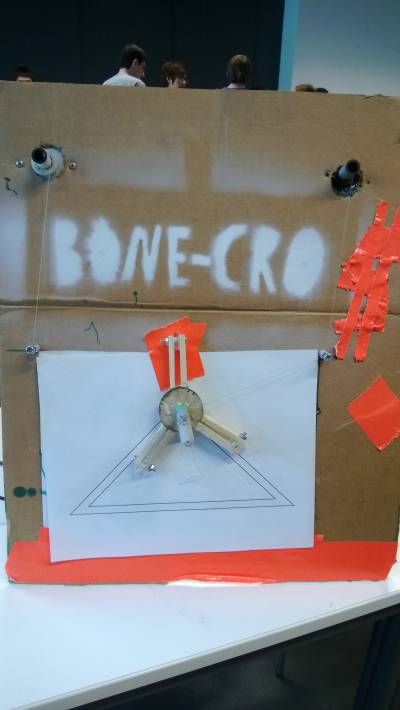
A drawbot designed to use an arduino and 2 stepper motors to control the position of a marker and trace out a triangle.
Front
The front was built to slant slightly backwards, with strings and spools mounted onto the motors above via epoxy and hot glue. Two pins were used to more accurately located where the string was when in was drawing on the paper, so that when programming the origin of the string could be set to to two corners of the paper. The pen was mounted on a wooden circle with three wheeled mounts forming a tripod around it to create stability. Spraypaint and duct-tape were added to add visual appeal.
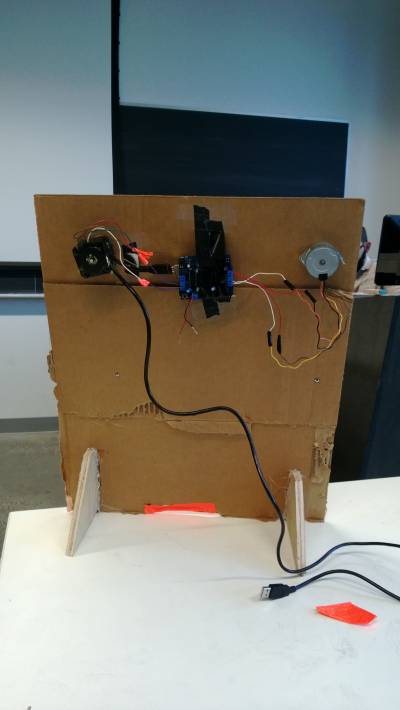
Back
Two motors were mounted to the back, one via screws and one via hot glue (due to a last minute error with the previously used motor and time constraints). The arduino and motor shield were hooked up together, with the arduino being fed 5V from a computer and the motor shield sourcing 12V to the motors. Reinforcements to the base were added on using hot glue.
The Program
The program defined the origin of the spools as the two pins on the board. A program was used that took a line and calculated the distance from a desired point, looks at the distance that the strings are currently, and steps up or down until the radius is within a desired range. The program would then increment the line to a point further up, and adjust the two spools accordingly.
#include <AFMotor.h>
#define Pi 3.14159
#define MAXSPEED1 420
#define MAXSPEED2 420
float R1, R2, radius, d;
AF_Stepper motor1(100, 1);
AF_Stepper motor2(48, 2);
void setup()
{
  R1 = 5.9424;
  R2 = 5.9424;
  radius = .25;
  d = 11;
  motor1.setSpeed(400);
  motor2.setSpeed(400);
  line1(5.5, -2.25, 8.8, -5.25);
  line1(8.8, -5.25, 10.35, -6.4);
  motor1.setSpeed(410);
  motor1.setSpeed(410);
  line2(10.35, -6.4, 6, -6.55);
  line2(6, -6.55, 3, -6.45);
  line1(3, -6.45, .45, -6.3);
  line1(.45, -6.3, 2.0, -5.4);
  line1(2.0, -5.4, 3.3, -4.25);
  line1(3.30, -4.25, 5.5, -2.0);
}
void line1(float x, float y, float x2, float y2)
{
  float t, r1, r2;
  for (t = 0; t < 1; t+=.00025)
 {
    r1 = sqrt((x + (x2-x)*t) * (x + (x2-x)*t) + (y + (y2-y)*t) * (y + (y2-y)*t));
    r2 = sqrt((x + (x2-x)*t - d) * (x + (x2-x)*t - d) + (y + (y2-y)*t) * (y + (y2-y)*t));
      if (abs(R1 - r1) > (2 * Pi * radius / 100))
    {
      if (R1 > r1)
      {
        motor1.step(1, FORWARD, SINGLE);
        R1 -= 2 * Pi * radius / 100;
      }
       else
    {
      motor1.step(1, BACKWARD, SINGLE);
      R1 += 2 * Pi * radius / 100;
    }
  }
  if (abs(R2 - r2) > (2 * Pi * radius / 48))
    {
      if (R2 > r2)
      {
        motor2.step(1, FORWARD, SINGLE);
        R2 -= 2 * Pi * radius / 48;
      }
      else
    {
      motor2.step(1, BACKWARD, SINGLE);
      R2 += 2 * Pi * radius / 48;
    }
   }
    }
    }
void line2(float x, float y, float x2, float y2)
{
  float t, r1, r2;
  for (t = 0; t < 1; t+=.0003)
  {
    r1 = sqrt((x + (x2-x)*t) * (x + (x2-x)*t) + (y + (y2-y)*t) * (y + (y2-y)*t));
    r2 = sqrt((x + (x2-x)*t - d) * (x + (x2-x)*t - d) + (y + (y2-y)*t) * (y + (y2-y)*t));
    if (abs(R1 - r1) > (2 * Pi * radius / 100))
    {
      if (R1 > r1)
      {
        motor1.step(1, FORWARD, SINGLE);
        R1 -= 2 * Pi * radius / 100;
      }
      else
    {
      motor1.step(1, BACKWARD, SINGLE);
      R1 += 2 * Pi * radius / 100;
    }
  }
  if (abs(R2 - r2) > (2 * Pi * radius / 48))
    {
      if (R2 > r2)
      {
        motor2.step(1, FORWARD, SINGLE);
        R2 -= 2 * Pi * radius / 48;
      }
      else
    {
      motor2.step(1, BACKWARD, SINGLE);
      R2 += 2 * Pi * radius / 48;
    }
  }
  }
}
Bone-Cro
A project looking to test the ability to attach Velcro onto bone for use in bio-medical applications. This project is aiming to find the relative shear strength of certain types of Velcro and seeking a feasible method of attaching the Velcro to bone during surgery that will be stronger than the Velcro-on-Velcro attachment.
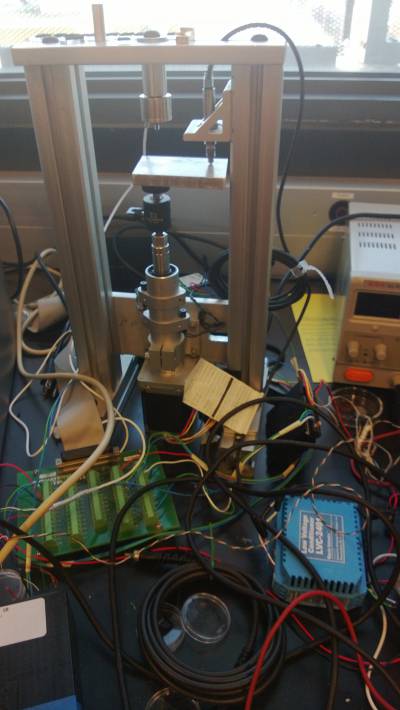
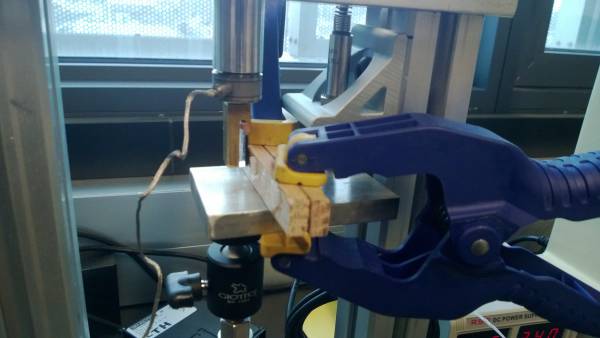
Our initial tests are looking into the relative strength of our velcro on loops under shear forces without considering the strength of the attachment. The machine used to test the force required to pull the velcro apart is a mechanical load tester that was previously built to test the strength of the cartilage grown into velcro loops:
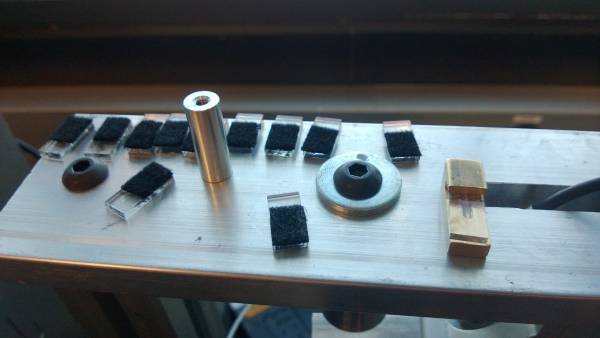
For out testing we wanted to ensure that repeated cycles of attaching and detaching velcro, which causes the velcro to weaken, wasn't an issue. As a result, a generic metal mount onto the machine was made, and cartridges of plastic with velcro attached were lazer cut and press-fit into the mount.
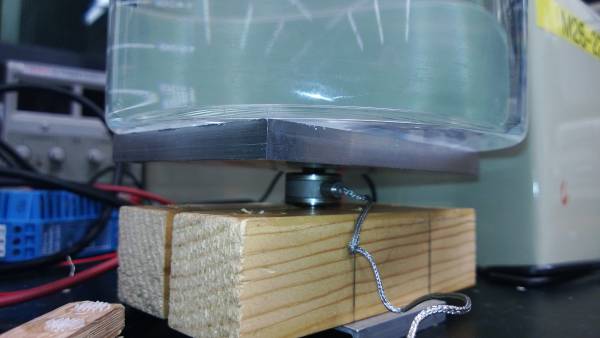
In order to test the load given on the machine, a load cell had to be calibrated. The original machine was limited to 25 grams of force, while our estimates for the needed load were around 3.5 lbs. As a result, a new load cell with a 5 lb range was found and calibrated for the machine. A mount was made that held a beaker containing enough water to make the whole system weigh 5 lbs to allow for the calibration of the machine at the maximum weight. A second point at 0 lbs was also taken to make a two-point calibration.
Our testing setup requires the hooks to be attached to wood and clamped onto the metal base. The hooks are pressed into the loop setup and the platform was raised until there was no net force on the load cell. The platform was then gradually raised while keeping track of the force on the load tester.
